Setting up SAM Broadcaster Pro
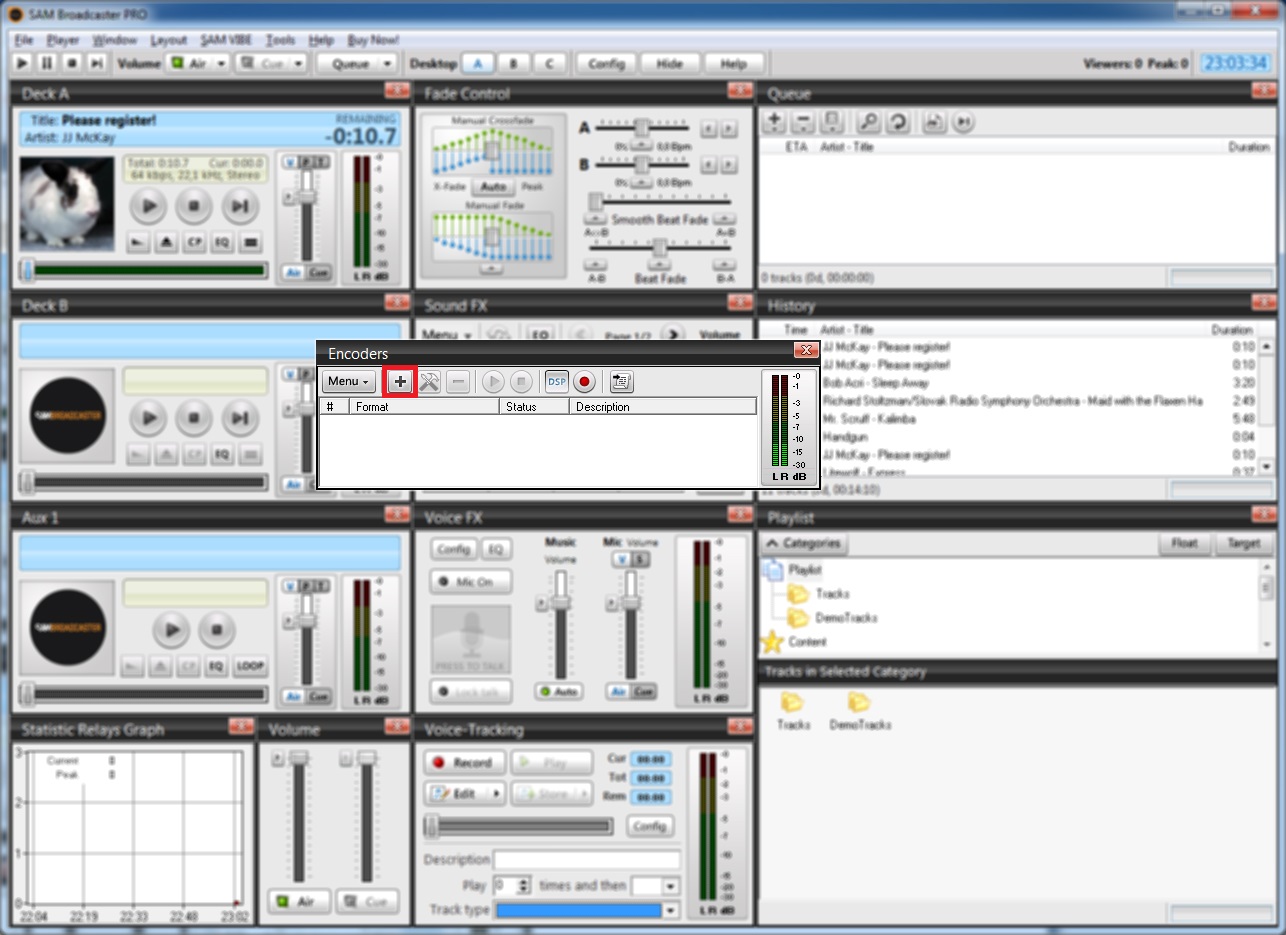
Once you have SAM Broadcaster installed and running select Encoders from the Window menu to begin.
03
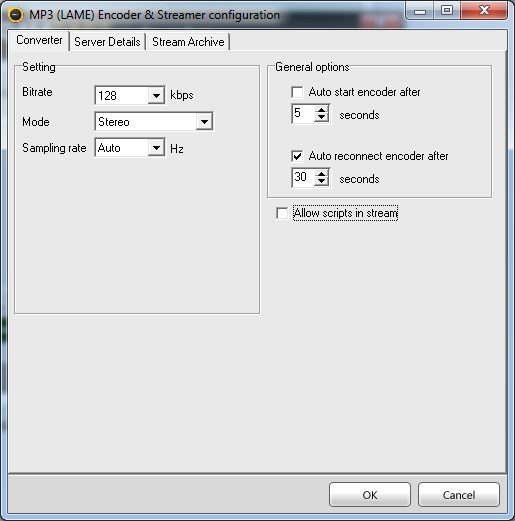
In the Converter tab, select a ‘Bit Rate’ of 256Kbps, however, whether your ISP connection can maintain this will depend on the number of applications using your internet connection, cable/wifi quality, how many hops your providers’ network takes to reach the backbone of the Internet, contention ratios etc. If this is the case we recommend you start at 96Kbps and work upwards. It can take some trial and error to find the best connection speed to use, even with a fairly poor connection you should be able to sustain a minimum of 48Kbps). Set ‘Mode’ to Stereo and leave the ‘Sampling rate’ set to Auto.
04
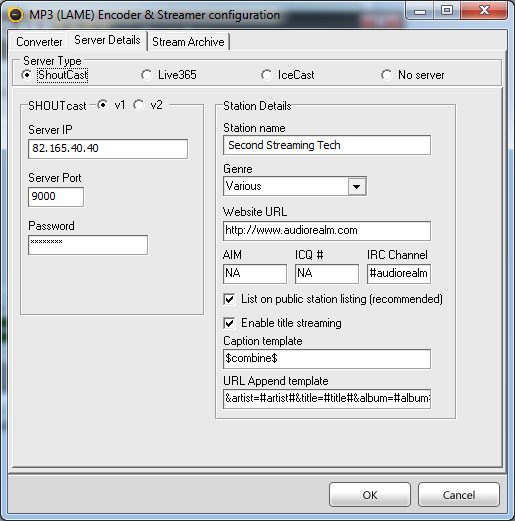
Under the Server Details tab, select ShoutCast in the Server Type area then move to the SHOUTcast section below and select v1, then enter you server address in Server IP, your port number in Server Port and enter your password (user password not your admin password) in the Password field. Under the Station Details section you can name your stream, select a genre and add a url if appropriate.
Your Second Streaming stream is provided in private mode for use in Second Life and does not connect to the SHOUTcast directory so ‘List on public station listing’ should be deselected, ‘Enable title streaming’ should be checked. Your setup is now complete and you are ready to broadcast. OK the encoder configuration.
You will be returned to the Encoders window, with the encoder entry you just created highlighted click the play button to begin your broadcast, when you are finished broadcasting, return to the encoders window and click the stop button to close the connection to your stream.


